Haunt Forum banner

Improving a Plastic Cauldron

270K views 77 replies 58 participants last post by  BluJay75  
#1 ·
I am working on a stirring witch this year, and wanted to improve the look of a plastic cauldron. There really isn't anything wrong with the shape of the typical plastic halloween cauldron, but the overall look is, well, plastic-y. I have set out to re-work one, and thought I'd share some progress pix and methods.

Texture:
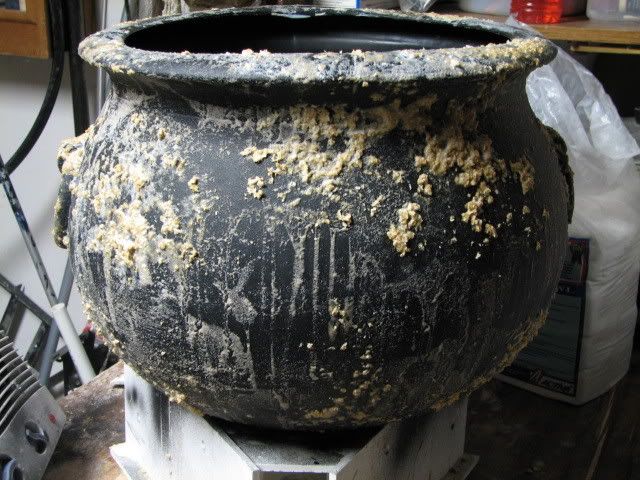
I have added alot of texture to the plastic surface by mixing oatmeal and sand into a water and glue mixture. I randomly applied it all over the cauldron.
Mmmmmm...Oatmeal.
Image


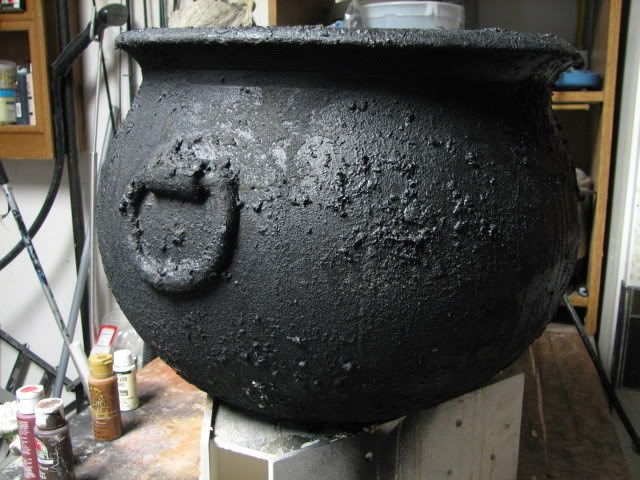
Once that dried to a very, very hard surface....(I mean really, have you ever tried to get oatmeal off a bowl after it dries????Impossible!) ...I primed the cauldron with flat black.
<<<note on paint...I have been using Rustoleum flat black primer/sealer rather than the cheap 96cent walmart paint...it has alot more pigment and therefore covers much better...this also means you use alot less of it>>>
Image


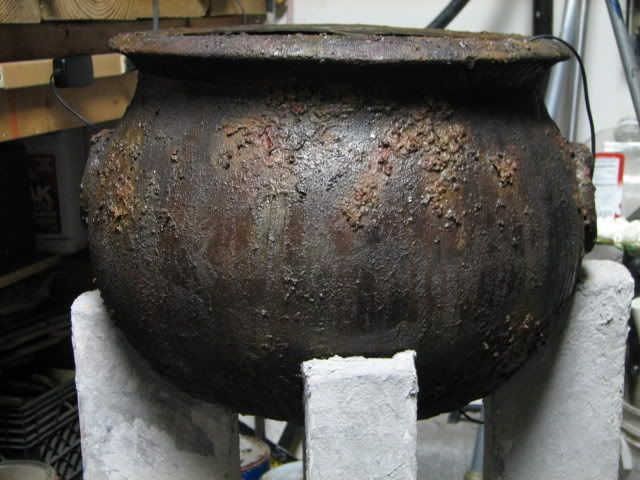
I have started with a rusty paintjob here using acrylics. At this point I am not 100% happy with the look, but need to progress a little farther on the cauldron stand before I go any farther with it.
Image


More to come....
 
#8 ·
that's funny dave
and here I thought you were using good old real oatmeal..
amazing what we use to make stuff hey
 
#9 ·
Lilly, I have no reservations about using any kind of stuff to make other stuff.

The oatmeal texture was a trial and error process....some things that didn't work too well are scrambled eggs, pancakes, sausages, poptarts...and don't get me started on the grapefruit halves!!
 
#11 ·
ha ..grapefruit halves dried could be used as a giant beehive thing.

but really the cauldron looks cool ..im sure you will make it all right
 
#16 ·
Wow, that looks amazing! How tall is this? What foods did you use to build the stand ha, ha!

Dave you are incredible, I have struggled for months on my current Halloween project and you slap your breakfast on a cauldron and create a masterpiece!

Wonderful job though, I have never seen anything like that!
 
#21 ·
super cheap strobe!!!!

Now that I mostly have the cauldron painted how I want it, I started thinking about other things to make it unique. I have the stand pre-plumbed to pipe fog into the cauldron from a hidden fogger source. I wanted a unique light effect to set off the "steam" coming out of the cauldron...
this is what I came up with
Image


What you see here is the finished LED strobe strip that has green strobing and a slower flashing blue LED circuit. The chip that runs the strobe came from the strobing flashlight wand pictured here purchased from Deals (a local dollar store) I have seen them for just about any holiday (really big around July 4th)

The chip inside has a red + and a black - wire going to the power source. There is also a + and - contact where the lights attach. All I did was connect wire leads to the light source contacts and string together 9 green superbright leds in parrallel. The leds were mounted through a piece of plastic hose that I joined in a ring shape.
Image


The slower flashing chip came from a "lightning bug gummy candy" display. It is a similar chip to the strobe chip, and was connected the same way, alternating a separate circuit of blue ultrabright leds on the ring strip. I then attached the + and - wires from a 4.9 vDC cell phone wall charger to the input terminals of both chips.

All totalled, this project took about an hour, and less than $5 to complete.

Here is the finished strobe inside the cauldron. The effect seems much slower in the video, but looks really, really cool in person.:ninja:
the elders :: strobe011.flv video by davethedead - Photobucket@@AMEPARAM@@http://vid105.photobucket.com/player.swf?file=http://vid105.photobucket.com/albums/m240/davethedead/the%20elders/strobe011.flv@@AMEPARAM@@vid105@@AMEPARAM@@105@@AMEPARAM@@m240/davethedead/the%20elders/strobe011